
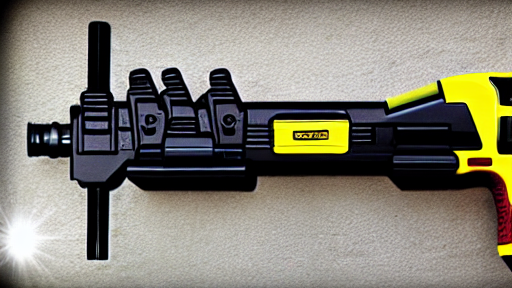
Let us first know about the Bostitch nail gun, it’s like a nailed. You can use this mechanism to plunge the nail into wood and particular materials. By using this nail gun, work will be easier and does not consume time.
Moreover, it is a safety mechanism to accomplish the job more quickly than handy instruments like hammers, which are not as safe in use and take time rather than the Bostitch nail gun.
As the result, a maximum number of people preferred to use it.
While using this nail gun, you just need to know how to load a Bostitch nail gun and does it work.
Let us have a procedure listed below for the nail gun.
Tips For Safely Loading A Bostitch Nail Gun
Keep safety a priority and follow some guard precautions in advance of loading the Bostitch Nail Gun because your safety always becomes the priority. Below, you will find some tips for security, then it will be beneficial for you.
- Under the nose of the gun, assume first that if pieces are broken, then replace these cracked pieces.
- Never aim the nail gun to your side, which may harm you.
- Before you load the fasteners, remember to connect the gun to the air supply.
- Ensure to load the nails without holding the trigger, as it can hurt you.
- Make sure you’re using certified Porter cable fasteners.
- You should wear safety glasses with side shields to protect your eyes from the pins.
How to Load a Bostitch Nail Gun?
It is a challenging job to load the Bostitch nail gun. Let us reveal some recommendations to load it and takes some helpful information from this article.
1: Check and Unload the Magazine
First, check the magazine to make sure the pins are in place. Then, take the gun apart and check the air source. It is vital to ensure that the magazine is empty and that it can be opened and closed freely. Because, it starts with the empty magazine slot, which will not jam pins inside it.
2: Connect the Air Source
Next, the magazine is removed, and then the air compressor is connected. Earlier loading the gun, you can also attach it to the air hose. Then fastened the air hose valve to the ¼ stud at the base of the gun handle. Make sure that the gun has been pointed in a secure tack.
3: Load Your Nails
At this point, to release the magazine, inform the firearm forth from yourself and others. Then pull the elastic device, to slide on the magazine backward until it locks into place. You can easily load the nails inside the magazine slot when the slide will open. Check during load the strip of staples with an accurate gauge and size as the model of nail gun you have.
After inserting the nails into the gun, you should then unlock the slide. Now the nail gun is ready to be used.
4: Finish the Task
The process of loading the staples into the gun is completed, and then the gun is placed in the safe area. To release excess pressure that may be stored in your nail gun, unfastened the air supply from it and press the purge valve or switch off the gun. Now test the gun to ensure that it is no longer capable of firing nails.
After you perform the shooting, remove the nails from the gun and open the base of the slide to remove any remaining nails.
Periodically Maintenance Of The Gun
Keeping the maintenance of the gun is essential, then it will work better, and you can use it for a long time. Here we have some precautions about regular maintenance of your nail gun.
- To operate the gun smoothly and swiftly, put oil in the moving portions of the nail gun.
- Make sure that the gun is powered off while you are cleaning it.
- Add some amount of the oil to the air fitting and the O-rings inside the air fitting, and then it will work faster and swiftly.
- Don’t use the lubricant agents to clean the nail fun. Apply compressed air to clean it.
- Bolts and screws necessitate fastened up regularly.
- Check the battery of the nail gun regularly. Linearly, it will help you to work more efficiently.
- Repair and fix the broken parts of your nail gun.
Shoots The Nail Gun Properly (If Not, Happens)
If your nail gun is not shooting in good order, check the jamming off, commonly found in every nail gun. There are many several reasons of nail gun does not work correctly. Jamming of nails does not allow the staples to move through.
Furthermore, the nose air cylinder conducts a lot of oil, which fails to shoot the nails. This issue is always caused by of lack of oil. In the gas fuel cell, it is either missing, outdated, or incorrectly installed.
How do you unload a Bostitch nail gun?
When you let go of the trigger on a nail gun, all of its nails are sent flying. That’s why it’s important to remove any unused nails before taking your tool out of service for storage or cleaning.
To do this, pull back on the push-bar bypass button and press down on the push-bar bypass button while allowing the pusher to ride over the remaining nails. Hold the pusher upright so that the remaining nails slide back towards the magazine slot.
Different Types Of Nails Gun Loading
There are many types and specialties of nails gun. They are different in functions and make the work easier. Let us mention below their names and specifications.
Framing Nail Gun Loading
It is a very useful model of nail guns. It comes in a framing nail. You feel some tricky at first, but after a time spending time, it will complete its job without taking time. These all nail guns have the same flexible device that carries the nails to the palace where it assembles.
Finisher Nail Gun Loading
The Finisher Nail gun is probably the same as the framing nail gun.
Brad Nail Gun Loading
These are not the same as the other nail guns. Because of it, you should handle them with vigilance when loading them into a nail gun.
Conclusion
The Bostitch Nail Gun is the best fastening mechanism, which makes the task faster than the other handy tools like hammer and nail. This nail gun is popular among the people and does not take time to completer their job. We recommend using this tool, which is safer than other instruments.
As above, we mentioned the tips about how to load The Bostitch Nail gun, if you follow those quid lines in a manner to load the nail gun. As a consequence, the work will be completed faster and with greater focus.
Frequently Asked Questions (FAQs)
Q: Why is my staple gun not working properly?
Ans: When you loaded the staples in the nail gun over, bent, or wedge in the top of the gun head, it will jam the gun and also create a problem while firing the nails. Staples usually get jammed when they are crowded, bent, or wedged at the very top of the gun head. Make sure that the pins are installed correctly, otherwise, you will face elbow grease and also blockage of the gun.
Q: How do I put heavy-duty staples in my Bostitch stapler?
Ans: Insert the sleeve of blistering pins into the carrying receptacle, with the prongs facing downward. Most of the Bostitch Nail gun comes with the visual aid that will be printed on the tray, it will be helpful with inserting the nails. Replace the following block in its cradle and press down on the top of it until you feel the spring begin to compact.
Q: Are Bostitch nail guns any good?
Ans: Bostitch nail guns are unmatched in terms of performance and enduringness. It is accelerated and dependable, which means you can get more work done in a shorter amount of time. So, you don’t have to hit hands with a traditional hammer while it will desire to make a living any longer.
However, every instrument like the Bostitch Nail gun also has some issues that hold of it is not so comfortable, which may cause harm to your wrist.
Q: Can you use any types of nails with a Bostitch nail gun?
Ans: The Bostitch nail gun has compatibility with all types of nails. You, therefore, don’t have to search the markets for a specific brand of nails. However, you will still have to be careful about getting the appropriate altitude of the nails, or you could face the trouble of a feasible jam.
Q: How do I load my Bostitch nail gun?
Ans: Loading a Bostitch nail gun is one of the easiest things you can do. You just have to follow a pattern, and you’re set. The actions include locating the sliding latch and unplugging the nail gun from the power source. Once you’ve located the latch, pull it down until it’s securely in place, and then follow the arrow drawings to determine the direction the nails should be inserted into the nail gun. Load the nails and release the latch.

